This is a much requested DIY at the studio. Tying the Perfect knot is not as easy as it may seem. Depending on the material and width of the ribbon, without these specific steps you could be in for an interesting time.
Follow these steps carefully and I promise you will (after a few tries) be tying your perfect knot!
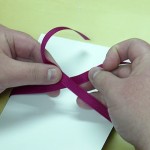
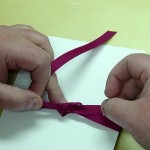
1. Wrap ribbon length around item you are tying, pull tight and cross the right side over top of the left.
2. Continue to tuck right side over and behind the left.
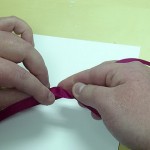
3. Pull tightly and place your left middle finger on top of the intersection.
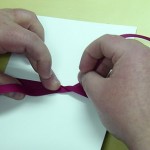
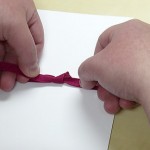
4 Now the left side will cross over and behind the right side.
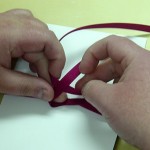
5. Keep middle finger on intersection as you tighten your knot. This will ensure you maintain a tight finish. As you tighten slowly remove your middle finger while at the same time ensuring you tug each ribbon end straight.
6. Don’t tighten knot while ribbon ends are at an angle, you will then have a knot that is at an angle!
7. Trim know ends to desired length. Use very new or freshly sharpened scissors.
8. There you have it – a perfect knot. Trust me, the first one you try feels very awkward, but you will find your rhythm after a few!

 View the Gallery