I have been painting since birth it seems. Well, really not since birth of course but art is in my blood. From the age of 5 or 6 I can remember making pine cone wreaths with Mom and sculpting little critters with friends. In grade school I began art lessons with a local mentor and grew with her to eventually becoming an art instructor throughout my college years. My hands were always dirty with paint, clay, ink or something shimmery and this still holds true today! After 8 years of creating hand painted, handmade wedding invitations I was looking for a way to share more of myself. A new friend in the industry emailed recently with just the nudge I needed, thank you Liene!
So…..Go Paint, Go Draw is a new series that I hope will bring all you budding artists out from the shadows! Whether you are a bride looking for interesting ways to incorporate sweet little details here and there or a fan of the blog who simply wants to learn a bit more about painting and drawing, this series is for you! I will be sharing easy tips to recreate some of our most beloved yet simple and fast painting techniques. A drawing lesson from time to time will certainly be part of the mix and of course feel free to request anything you might like me to share!
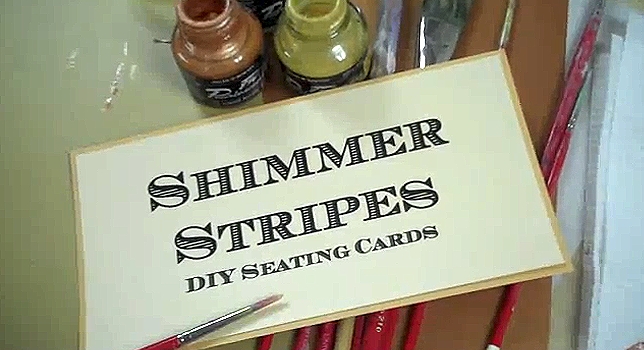
So onto the first painting lesson! Recently a collection of our stationery pieces were featured as part of the “California Luxe” team’s work as seen on Martha Stewart’s The Bride’s Guide. The painted stripe place card as seen here is the technique we will be re-creating today.
WATCH THE VIDEO and follow along step by step…
One/Materials – We use custom mixed shimmer inks but you can find a starter set of a similar variety to include copper, silver and gold at any Michael’s or A.C Moore. A #4 Watercolor brush is my favorite for this project and of course add a small container of water, paper towels for blotting and a few sheets of scrap paper to keep the table clean! The place cards can be printed at home or at any local print shop, they will also cut them for you!
Two/Paint – Use your #4 brush and begin by dipping brush in 1st color. Paint a stripe about 1/2 inch in from the right. Rinse brush and paint a stripe of water next to the first paint stripe. Now dip brush in your 2nd color and repeat with water and color brushstrokes until you have one of each color stripe painted on the card. The strokes of water in between color strokes are meant to help the colors bleed together and create that juicy watercolor look. The video repeats the painting technique twice but keep in mind there is really no wrong way to paint these stripes, just have fun! Important tip…blot your brush on paper towels in between each paint or water dip.
Three/Tap – Once painting is complete tap the card lightly against the table to give the look that dripping effect. The tapping motion will help the colors continue to blend and wash together. Set cards aside to dry for at least 5 minutes. You can check dryness by lightly patting the surface with your finger, press down and lift your finger straight up to ensure any wet paint isn’t smudged.
Four/Display – After drying the cards can be mounted to folded tent cards or left flat for hanging etc. Have fun!!
Last but not least is a fun GIVEAWAY to launch the new Go Paint/Go Draw Series! So comment on this post and tell us what inspires you most everyday OR why you want to learn to paint and/or draw. One winner will be chosen at random to receive the following:
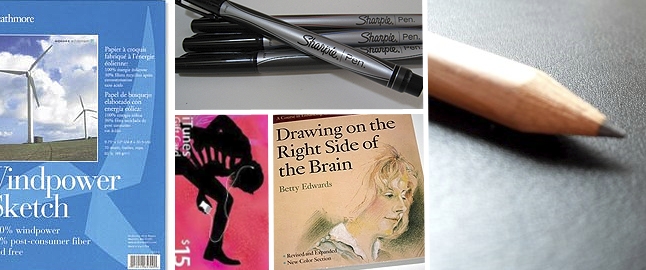
– Betty Edward’s Drawing on the Right Side of the Brain original edition. This book was my artistic Bible growing up and can teach, ANYONE how to master some basic drawing skills.
– A collection of my favorite drawing and painting tools. A #4 paintbrush, HB Drawing Pencil, Rubber Eraser and a black fine point Sharpie pen.
– A Windpower sketchbook from Strathmore.
– A $15.00 I Tunes Gift Card to help you get in the artistic mood and stay inspired!
Contest deadline is Saturday December 11th at 12 noon! Good Luck!

